 FreeLUG
Association nationale rassemblant les passionné·e·s de la brique LEGO®. Depuis 2003
FreeLUG
Association nationale rassemblant les passionné·e·s de la brique LEGO®. Depuis 2003
 Exhausting design of a cannon
The creation of a MOC, like all creation processes, can sometimes be painfull if your self expectations are high and if the parts don’t place themselves naturally.
With LEGO, we can incorporate as much fidelity to the original we are searching to reproduce as we want. Some people think that, as the LEGO brick is a toy, complete accuracy to the original should only be suggested and constructional integrity and playability should be prioritised. If you can give your MOC to a child and they can play with it without it falling to pieces then the goal is reached for this kind of builder.
Another group of builders (to which I probably belong, possibly because I didn’t have a real model maker period) try to reproduce as many details as possible, sometimes to the detriment of sturdiness.
Some others go even further by building MOCs that don’t really have any structural integrity but that are just separate elements posed for photography [1]. I personally try to not go that far, the LEGO system is a building toy after all so I try to make my MOCs in one piece.
The inspiration to build a particular model can come from observation of everyday life, seeing the achievements of the other fans of LEGO or even of the sight of just one LEGO part which just shouts out to be used to represent an element of a model.
The cannon which is the theme of this article was inspired by one from Brickshelf. Unfortunately I can’t find it again so I cannot credit the author, but here is a summary of what it looked like :

- Idea for a cannon as seen on BS
On the other hand, the one-piece cannon designed by TLC is well known to the pirates fans.

- Official TLC model
The realization of a gun thus prooved a little vain from the beginning, but I nevertheless decided to try my luck, without knowing that this very small MOC was going to make me tear my hair out!
When I start a model, I initially study the original (either directly if possible, or from pictures from Internet), and I decide which will be the details that I absolutely want to reproduce (which are generally the characteristic elements) and which are the details that I will leave out because they are too small or too awkward.
For my gun, here is the list of criteria I followed :
![]() 1) A four wheeled base, with the base sloped at the back.
1) A four wheeled base, with the base sloped at the back.
![]() 2) The cannon must not be too high, for example the hole should not be higher than a minifig’s head.
2) The cannon must not be too high, for example the hole should not be higher than a minifig’s head.
![]() 3) The barrel must have a ball at the rear end of the barrel, which should also, if possible, be rounded (these things are characteristic elements of a pirate cannon). Obviously the barrel must have a round section, not a square one.
3) The barrel must have a ball at the rear end of the barrel, which should also, if possible, be rounded (these things are characteristic elements of a pirate cannon). Obviously the barrel must have a round section, not a square one.
![]() 4) The barrel of the cannon should be as hollow as possible.
4) The barrel of the cannon should be as hollow as possible.
![]() 5) The barrel should be tilted upwards. If possible it should be ajustable but this is not essential.
5) The barrel should be tilted upwards. If possible it should be ajustable but this is not essential.
Thats the basics, but even so there are quite a lot of constraints. If you wish you can stop reading this article here and try to do your own model with these constraints :-) [2]
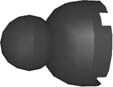
Part #50 ![]() made an obvious starting point as it is perfect for a nice cannon ass (pardon my English ;-)). However after a while I realised that it is a bit too small for the kind of cannon that I wanted to do. From a one stud diameter I moved to a two studs diameter. Fortunately there’s a rounded part in two studs wide that I could use for the back of the cannon, the “cylinder 2x2 with dome top” #553 :
made an obvious starting point as it is perfect for a nice cannon ass (pardon my English ;-)). However after a while I realised that it is a bit too small for the kind of cannon that I wanted to do. From a one stud diameter I moved to a two studs diameter. Fortunately there’s a rounded part in two studs wide that I could use for the back of the cannon, the “cylinder 2x2 with dome top” #553 :

Part to which I add a “technic ball joint” #203 in order to obtain a back like I wanted and then respect the constraint number 3.
Forfilling the first constraint is not really difficult, it’s when you have to respect all of them that it becomes difficult. Maybe the cannon’s back that I like would have to be entirely modified to satisfy another constraint and, this way, find a compromise on the overall look of the final model ? Let’s see what’s next... I chose a 2 studs diameter, I now have to search in my stock and in my head to find a part or an assembly of parts that respects the constraint number 4 (open hole). The underside of a 2x2 round brick is not really open because there’s a tube in the middle. Obviously we can find more easily 1x1 bricks that well represent the hole of a cannon. Of course there is the 2x2x2 barrel #2489 but can we find it in black ?

- Barrel 2x2x2 n°2489
A quick search on Bricklink says yes, but on the other hand the part is rather rare thus rather expensive. Apparently if I use this part, it will be difficult to produce large quantities of these guns, for example to fully arm a galleon ! No worries right now, I am not a builder of the first kind who prefers playability :-)
So, now the front and the back of my gun satisfies constraints 3 and 4. But I still MUST anticipate future problems : the two parts have the studs in opposite directions. It thus will be necessary to make some SNOT 180° ! I have also to find a way to attach the gun to its carriage, all this in a very small space.

- Snot 180° !
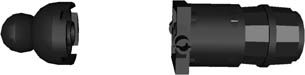
Next, I decided to work on finding a way to fix the barrel, which at the same time would satisfy constraint #5 (upwards tilt). To satisfy this constraint, we obviously need an axis crossing the gun diametrically. I thought the body of R2D2 (#30361) would fit, but with the base being beveled the junction with the back of the barrel is problematic. In addition the hole through the axis is quite large, so fixing promised to be too bulky and thus unaesthetic. There is also the dustbin which has handles on sides, but unfortunately not oriented in a useful direction. Finally there are a few round parts 2x2 allowing a fixing on the sides. I also sought solutions to benefit from the SNOT 180 problem I had given myself to create the axis which I needed, but I could not find anything satisfying. After going mad trying to find a solution with round parts, I finally settled for looking at what square parts could offer me. The choice being wider, I searched around quite a long time before I chose the wheel holder #4600 which has the advantage to offer a very small fixing axle and having a square section that is quite thin.

- Various tested parts
Well, I chose my part but I still have the choice of its orientation, knowing that it doesn’t help me for the SNOT 180° that I still need to do. Finally I chose to orientate it with the studs towards the front of cannon because there is more space in the back to do the real stud U-turn. This is where my troubles started :
Normally it’s quite simple to put two 2x2 round bricks head to tail : You just need to slide a technic axle in their middle. But the 2x2 round bricks have cutouts at the bottom to allow for the studs on which they stack. When you put them head to tail you get a great hole that I don’t find aesthetically pleasing. I then wanted to find a way to avoid or fill in this hole.

- Inelegant hole
One thing leading to another, I thought that this hole could represent the hole that we find on the real cannons which is used to hold the fuse. So I added a sixth constraint :
![]() 6) Create the fuse detail if possible.
6) Create the fuse detail if possible.
I searched around this forced SNOT 180 for a way to add a fuse and after a lot of attempts, I finally found a solution with a minifig hand, that I find very neat !

- A minifig hand as a fuse
But the problem I didn’t think about is if I want the fuse on the top then I need to rotate the back of the canon of 45° compared to the front ! So in theory I have my SNOT 180 but it’s impossible to connect to the front part. One might as well say that my SNOT 180 is useless and that everything has to be redone. I stayed stuck on this precise issue for several days, thinking of it in my bed while falling asleep or in the subway to kill time...
In general if I need to make a rotation of any angle, I try to do it on a stud (turntables are also ok, but they give a free rotation as opposed to a fixed one with studs). That’s why I thought of some solutions where I stacked a round 1x1 plate on the middle of the round 2x2 brick, however this created a hole bigger than the one I was trying to remove. In that case it wasn’t worth it and I would prefer give up the fuse and have a cannon that doesn’t look like Swiss cheese.
I finally understood that my problem came from the studs on the 2x2 round brick that I had to suppress. Of course there are some 2x2 round tiles but then how can I connect the back to the front ?... After all I only needed to ask myself “Is there any round 2x2 part without studs on the top ?” to see the solution coming to my mind as obvious...
Of course this part exists, this is the barrel I already used for the front hole and which has the good form to have an axle hole in its bottom. And then I felt the “delivery” feeling where an obsessive problem finds its solution at last. :-) The rest of the MOC is just some classical tuning for a MOCer.
A good MOCer knows that an axle hole can also be crossed by a bar in friction (same diameter of what a minifig’s hand can hold). So I replace the technic axle by a L4 bar #30374 (light saber blade) and I stack on the end a round 1x1 brick with a hollow stud. This becomes the stud on which I can rotate to 45° the back of the cannon.

- Bar and 1x1 round brick
You only need now to stack a round 2x2 plate on the wheel holder to make the junction, but BE CAREFUL ! you need the new version of the round 2x2 plate. All the good MOCers know that this part exists in two shapes, the old one and the new one, and both of them are useful depending on how you want to use them. The old version has the axle grooves along the whole height of the part while the new one has these grooves only along the top half of its height, and the bottom half is like a normal tube.

- Finished cannon
The cannon itself was now finished, I was able to start working on the truck. Fortunately the truck was easier to do. I first tried to find a solution in 3 studs wide (2 studs under the gun, one half stud on each side) because I was afraid that 4 studs was too wide. I was considering holding the canon axle on two “plate 1x1 with clip vertical” #4085. But the final solutions were not much less wide than 4 studs (mainly because I needed an additional plate to stack the “plate 1x1 with clip”). Moreover 3 studs complicate a lot the achievement of the wheels.
I then became reasonable and moved to 4 studs. A 4 studs base simplify the building, the only difficult thing is the wheels. I wanted some wheels not too big and if possible not to thick and also not too small. For example, I think the wheel rims (without tyres) used in some MOC in Brickshelf are too thick compared to their diameter.
At one moment I thought of using the “Hose reel 2x4x2 Drum” #4210 part whose diameter and thickness suits me perfectly. This part is in fact a hose reel that I use in a different way as a wheel. Unfortunately the diameter of the axle is not standard so it’s impossible to clip it on a part. That’s why I tried a design in 4 layers of plates ; here’s the basic idea (note that the base is here in 3 studs wide) :

- Hose as wheel
Note that the SNOT design (studs down) is necessary if you want the wheels to touch the ground.
But finally I found that the base was too long compared to its width and also the 4 plates stack would make me miss the constraint #2 (canon not too high). So I choose a more classical solution with the small train wheels put on normal wheel holders (even if the total width is now 6 studs). Moreover adding a 1x3 slope brick on each side allow me to respect easily the constraint #1 (beveled back).

- Truck with small train wheels
Then I naturally thought of using a “jumper” #3794 and the “tile 1x1 with clip” #2555 to realize the fixing of the cannon axle. Unfortunately the wheel holder has a little beveled stop which normally prevents the wheel rubbing against the plate. Here this little stop prevents us from correctly clipping the wheel holder on the “tiles 1x1 with clip”...

- 1x1 tiles with clip
Does that mean we have to remake the design of the canon axle (and come back to the beginning or almost the beginning)? Fortunately not because there’s a design that free us from this problem and which use an Erling brick and a “plate 1x1 with clip horizontal” #6019. Moreover this design has the unexpected advantage of lowering the height of the cannon allowing me to respect constraint #2 (cannon not too high). And constraint #5 (lean toward the back and variable lean) is totally respected !

- Use of 1x1 plates with clip
I finally succeeded in respecting the whole 6 constraints that I imposed on myself and I find the “global” look of the MOC quite pleasant. So this will be the final design of my MOC. But you can see that the final design use some “plates 1x1 with horizontal clip” and some tiles 1x1 in brown, parts quite rare in that color which will again increase the price of this MOC (by default we can also use these parts in black if we have some difficulties finding them in brown) !

I didn’t count the number of hours spent on this MOC but I think it’s around ten hours. I hope you have appreciated sharing with me my troubles and my joys during the reading of this article !
You can find some pictures in my Brickshelf galery.
Below you can download the LDraw file of the MOC by clicking on the icon.

- Fichier LDRAW du modèle.